mkt33
[PuristS]
5252

Thirst for Knowledge- Part 2
Weapons For The Challenge
At last Stefano found a set of three original N.O.S. Valjoux 22 balance staffs. We were ready to go.
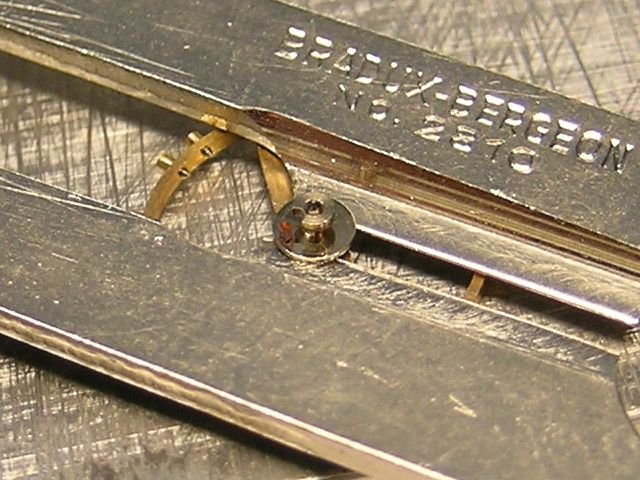
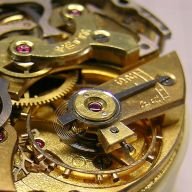
I made a knowledge on staking tools. Learned about punches and stakes, their diameter, their use. I spent days searching for the right tool on internet auctions and watchmaking shops. I even considered buying a specialized tool, the Platax, just for removing the old staff.
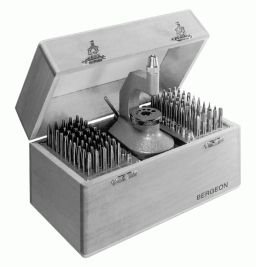
The Platax, actually much smaller than it seems in this picture, is a highly specialized (priced accordingly) tool for removing the balance staff. But that's only half the work. You still need a staking set to fit the new staff... [picture from Bergeon's catalog 2008]
At first I looked at used staking set, a Bonelli 4.5 mm (no, if I ever want to add new punches or stakes, this non-standard diameter might be a problem) a Boley 4.7 mm (the diameter is right, the tool is beautiful, but there are too many stakes missing), a Seitz (wonderful, but too much stain on the stake), a Star (fantastic, but too expensive) and many others.
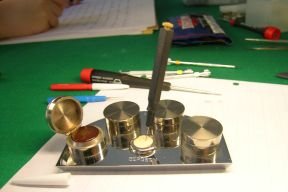
I must say this hasn't been an easy decision. Having the right tool doesn't make you do the job right. However, without the right tool you have no choice. So eventually, I ended up buying a brand new Bergeon 5285-C for a reasonable price.

Bergeon 5285-C staking set |

The real thing, wow! |
When I got home, opened the sweet wooden box, and found a ton on punches and stakes grouped in plastic bags and wrapped up in oiled paper, one by one, I was amazed. It took me well over an hour to put all the punches and stakes in place. A delightful experience, I would say 
The Final Battle, er... Work!
Removing the old staff
After practicing on some junk movements, mostly old chinese stuff bought at a flea market, I felt ready to ...
Not a nice job indeed :-(
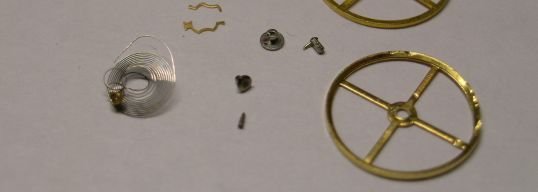
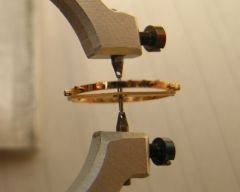
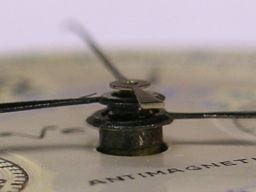
Start! I mark the ruby pin position and the collet position with a felt tip pen (marks will be easily removed later). This will make easier to restore the hairspring and the roller (actually this is a double roller) in their original position, keeping the watch 'in-beat'.
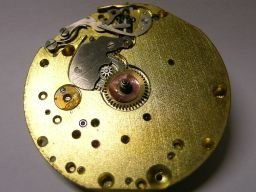
Removing the balance spring is a delicate thing. No caffeine allowed, you need firm hands. I use a pair of hairspring removing levers (Bergeon N.5430, with red plastic handles). I see there are scratches on the balance, but I found the same scratches in some pictures taken before starting the job. Maybe this is not the first time this watch is being restaffed.
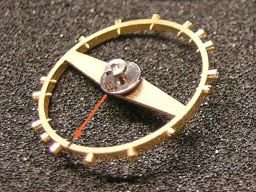
Be careful. Keep cool. Take your time. Should my hands slip removing the roller, I may end up bending the arm (tool used: Bergeon N.2810, a cheap roller remover that proved to be effective and easy to use). The roller lifts with a snap leaving the old staff untouched. Good.
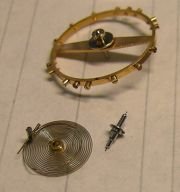
There are four parallel segments scratched on the lower rim of the balance. Those tiny scratches were made when poising the balance to remove material from the heaviest side. I assume that in-factory poising is made acting on the counterweight screws only, so this could be another proof of a past 'surgery'.
Many watchmakers agree that the hole in the middle of the balance stretches to some extent every time you remove the old staff with a punch. The best method involves a lathe, using a graver to remove the rivet. This ensures that you can replace the staff as many times as you like with absolutely no damage to the balance. My opinion is that there are several reason to go with the staking set in this case. Hopefully I'm not going to replace this staff very soon, and I don't earn a living from this work so I could take as much time as I like to do it right. The rivet on such a small balance is small – when compared to a much bigger pocket watch – and fragile (because of steel hardening) so it should break like glass if properly hit. And, last but not least, I don't have a lathe – yet. (BTW, so what is the Platax for, then?)
- An Introduction to Replacing a Watch Balance Staff by Mark Headrick (lathe method)
Getting Serious by John Davis (considerations on both methods)
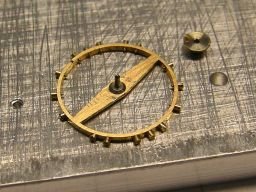
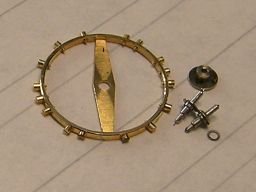
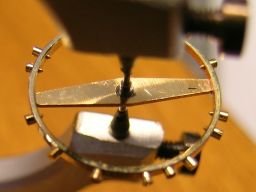
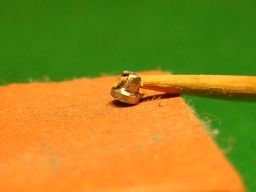
Old staff removed. It just took a single hammer hit on the punch to break the old rivet (it's the small ring on the right in the picture below). See the felt tip mark near the upper rim of the balance (indicating the original position of the collet's slot) and the old staff near to the new one.
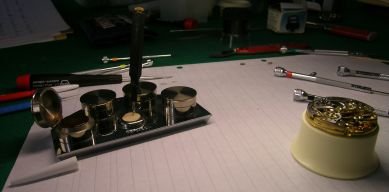
Setting the new staff
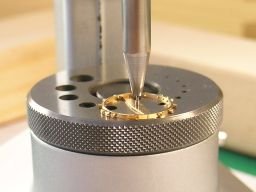
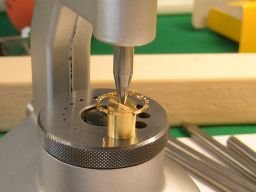
A hollow brass cylinder helps in supporting the arms of the balance. Gently tapping the flat nose punch with the hammer, while rotating the punch at each tap, and the new staff is in place. Now I only have to turn the balance upside down and rivet the staff. This will take a bit. A round nose punch will spread the rivet, then a flat nose punch will flatten it, assuring an even 'seat' for the hairspring's collet. Alternating each tap with the rotation of the punch helps improving overall trueness.
Checking the balance
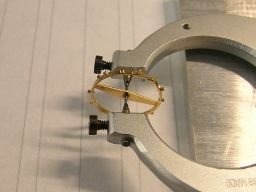
The tool used here is a truing caliper, shaped as a figure '8' (this tool is actually called figure 8 caliper in other languages too, e.g. 'huit-chiffre' in french and 'ottocifre' in italian). It is a simple tool that can also act as the poor man's balance poising tool.
Check 1 (trueness): I clamp the balance so that its pivot shoulders touch the tool's nibs (i.e. the pivot holders) so that there's no endshake nor sideshake. While slowly rotating the balance I compare its rim to the edge of a rectangular piece of aluminum firmly kept as near as possible. Testing of roundness and flatness can be accomplished by moving the piece accordingly. Passed.
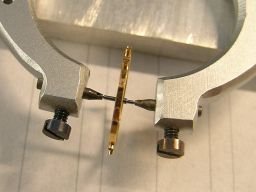
Check 2 (poise): I mount the roller, put again the balance within the clamp, this time allowing for some endshake, and spin the balance with a gentle puff of the dust blower. My guess is that a heavier spot should stop the balance always in the same position. No heavy spot found, despite all my efforts (yes, I do like to play this way . Passed.
It's now time to mount the hairspring and check the balance in its 'habitat'.
Check 3 (beat): With the mainspring fully unwound, I dismount the pallet fork, mount the balance assembly and see whether the ruby pin lies in the middle of the banking pins (or better, check whether the ruby pin lies on the imaginary line drawn from the balance staff to the pallets pivot). It does, as far as I can see, though it's a bit difficult to tell. After that, I mount the pallet fork and see that the impulse face of the pallet lies flat on a tooth of the escape wheel. Passed!
All three checks passed. That's quite suspicious, to say the least. According to all my readings, and life experience as well, there is always something wrong waiting to be discovered. Of course I've been treating this little piece of metal (I mean the balance) like the whole life on earth would depend on it (well, mine actually would but this must be the beginners' luck or it's just me unable to see any errors.
As a matter of fact the balance starts moving evenly as soon as I wind the mainspring. I'm incredibly happy!
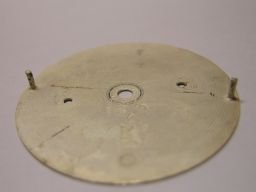
Removing the dial
If I want to clean the balance jewels, I must remove the dial. Take note: there are two eccentric screws that hold the dial feet. Half turn each will release the feet, then gently pry the dial off.
Let's have a look at the hands before removing them.
A reference to remember how are the hands stacked.
The dial (gold plated silver?) is made in Chaux de Fonds, Swiss.
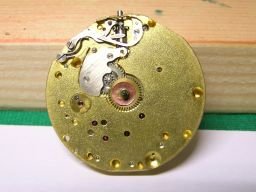
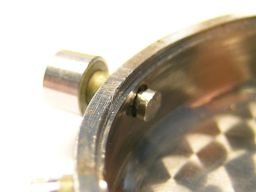
What's under the dial? A nice surprise. The lower balance jewel is held with a screwed chaton.
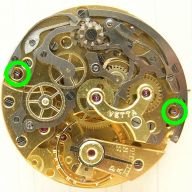
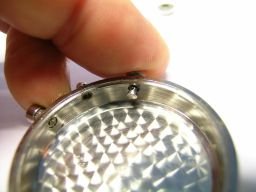
I have been daring enough to restaff but I'm not a fool. I know I'm not skilled enough to dismount, clean, properly oil and remount this movement. So I dismount only some of the chronograph parts, just to access the going train jewels and bushings, and clean wherever possible using rodico, benzine and manually sharpened toothpicks.
After sparingly applying a bit of oil, the movement is ready for timing checks. Let's see what happens.
Pusher repair
Meanwhile, there's still some work to do with the little piece holding the reset pusher. A new pusher seems out of question but, again, Stefano comes along and turns a piece of steel with a very big lathe (certainly not one suited for watchmaking). It's very difficult to make such a tiny part using such a big lathe, but the result is great: the new piece is almost identical to the original one.
Some little refinement is required. The part is still a tad too thick than required and the surface acting on the reset lever is out of flat.
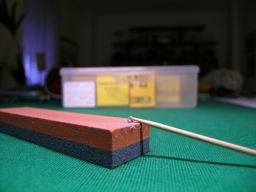
Honing, checking, honing, checking, honing, checking ...

Half an hour later, the new pusher perfectly fits the tube and its flattened surface smoothly operates the reset mechanism.
Timing
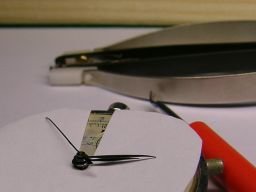
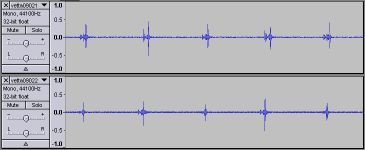
I don't own a timing machine so during the past weeks I bought a piezoelectric contact-microphone, and use the sound card of my PC to record the beat of the movement. The setup is quite tricky but it works.
I record all data with audacity (great free software ) and analyze the results with a bit of math (and a lot of patience).
After tweaking a bit with the movement (dismount, clean, re-oil and remount the balance three or four times) here are my best results:
| dial up | dial down | crown down | |
| Rate | +6s/d | +10s/d | +12s/d |
| Balance amplitude | 280° | 255° | 240° |
| Beat error | 1.9 ms | 1.9 ms | 2.4 ms |
Nowhere near an officially certified chronometer, especially the beat error. But, after all, this is my very first restaff and I've been lucky enough to consider myself satisfied. Moreover, the maximum spread between positions is just 6 seconds, which is not bad at all.
I decide not to touch the regulator, leaving it in the middle position.
Conclusion
It took one year to complete the work, but the results were well worth the effort. I've learned a lot of new things, got some new tools, and my watchmaking skill – though still poor – has grown up considerably. I've had a lot of fun too but, best of all, this old beautiful watch is back to life again.

its loveliness increases; it will never
pass into nothingness ...
[Keats]
References
- Castellazzi, Reto - Watch School articles
- Daniels, George - Watchmaking - 1999 - Philip Wilson Publishers Ltd. - ISBN 0-85667-497-4
- Darlor Watch Company - A Canadian commercial web site with lots of vintage watches.
- Davis, John - A Day in Watch School - A brief description of the two-years watchmaking program at North Seattle Community College
- Davis, John - illuminating posts, articles and reviews for The Purists
- De Carle, Donald - Practical Watch Repairing - 3rd Ed. 1969 - NAG Press Ltd. - ISBN 0-7198-0030-7
- Fried, Henry B. - The Watch Repairer's Manual - 4th Ed. 1986 - American Watchmakers Institute Press - ISBN 0-918845-11-4
- Häni, Urs - Training Presentation - Witschi Electronic AG, 2003
- Headrick, Mark - Various articles at www.abbeyclock.com
- Les pages de Giulio Papi at horlogerie-suisse.com - various articles , in french.
- Tokei Zanmai - Restoring a Valjoux 23 chronograph - in japanese (translated version)
Wyler Vetta Depuis 1896, by Wyler Vetta (1999)
Thirst for Knowledge--Bringing an old chronograph back to life by Marco
Thirst for Knowledge- Part 2


A fantastic article and a great read..............

Brilliant..

If they can do it, you can do it... Bravo for such a patience & determination

Now that is passion and skill. Great post. many thanks

Bravo!

Great post!