A Day in Watch School - Part 1

A Day in Watch School
(ok, most of a quarter really)
click the small pictures to get a better look, sorry for the crazy lighting, the flourescent lights are a real joy

by ei8htohms
© 11-29-2001
Watchmaking school has been a goal of mine for about three and a half years. Ever since reading an article about Abraham Louis Breguet in early 1998, I have studied on my own and then with the guidance of a kind and skilled watchmaker in San Francisco, but always knew that I wanted to go to school to get an in depth education in horology. I moved from San Francisco to Seattle this fall thinking that I had to establish residency before I could afford the 2 year program offered by North Seattle Community College. A few weeks into the semester I decided to stop by the school to introduce myself to the instructors and was quite surprised to hear that the in-state/out-of-state thing is irrelevant because of their officially unaccredited status (a status that has been on-again/off-again with the watchmaking program there for many years). Before I could get too deeply into my plans for revenge on the misinformed admissions office, the instructors offered that I could take the entrance exam and start late (it was already three weeks into the semester)! What wonderful news.

 The first few quarters of the program are dedicated to manufacturing. Through a series of practical projects the students are acquainted with jewellers' saws, hand files, the watchmakers lathe, the drill press, heat treatment of steel and a variety of finishing processes (no Geneva stripes yet). Most importantly, we are gradually introduced to the extreme precision that is required for making small parts by hand. Beginning with tolerances of around 0.2 millimeters, we have gradually worked down to tolerances exceeding 0.05 millimeters and it ain't over yet. We are also taught the importance of a fine finish on all components, sharp edges and accurate angles. The work is extremely demanding but extremely rewarding as well (to me at least). As my experience with horology thus far has been primarily with the repairing, servicing and adjusting of movements and studying the theoretical aspects of escapement design and timing, this portion of the course has been almost entirely new to me. And I love it. Making stuff is fun. Mostly what we do though is sharpen gravers.

Here are some of the projects we've made so far:
The first project (after a few technical drawings) was this wood filing block. It's some kind of ridiculously hard wood that is clearly chosen to make working with steel later seem like a relief. Mine was a little rough but got a passing grade and I decided I would settle for that until I was at least caught up with the rest of the class.

 The next project was this pair of angle rulers, one in brass and one in steel. The real challenge with the brass piece was the angles and edges within the cutout portion. getting a good sharp corner in such a situation is no easy trick. The challenge with the steel piece was hardening it without warping it and then cleaning it up and blueing it with some consistency of appearance and color. I spent a good half day experimenting with hardening temperatures (colors really), soaps to lessen scaling (an unattractive surface phenomenon that often plagues steel when it is hardened) and quenching techniques (oil, water, angle of insertion; all of these can have profound effects on whether or not the piece you just spent a few hours making will warp itself into uselessness in a millisecond) before I hardened this one. It still warped (but only a little).
 The next project was this angle ruler, also in steel. By the time I made this one I was getting much more comfortable with the techiques involved and paid extra attention to the finishing of edges and keeping nice clean lines and sharp corners. I've used this little tool several times since when trying to make a 60 degree angle on a piece of work in the lathe. Using tools you've made by hand is great fun.
 The next project actually looked like a tool I recognized (and use frequently): a balance tack. This tool looks like a large brass tack that sticks up in the air from a stable base. It is used when adjusting a collet, removing screws from a balance or turning meantime screws. The balance is lifted out of the movement by its bridge and the bridge is slid onto the balance tack through the screw hole. In this way the balance dangles down and can be manipulated without removing it from the the bridge entirely. This was also the first piece that we were allowed some creative license. Although the conical section of the tack, the base and the overall height were fixed, there is a section of about 17.5 millimeters of the shaft to do with as we would. My design suffered from being pieced together in different stages (indecision can be a killer) and resulted in a very tricky (nigh on impossible) execution. After five tries at a shaft (to fit a "perfect base"), I finally realized the errors of my design and made a new base and a shaft to fit it. The square shoulders of the shaft mushroomed slightly when I rivetted it but the teacher apparently empathized with the difficulty of the design and gave me a great grade anyway.
 The next project proved even more daunting. While the shaft of the balance tack was turned on the lathe, the center punch was the first piece of steel to be turned on the lathe and presented some interesting challenges. Once again our creative license got the best of me and it took me roughly five tries. The hexagonal portion in the middle was a little tricky but I almost ruined it trying to get a very nice finish on it. In the process of attempting to black polish the shaft and the grooves surrounding the hexagonal portion I rounded the shoulders a little and barely passed (I think she was grading pretty leniently on this one).
 The next project was a real challenge. We had to make five steel carriers for supporting work to be turned in a Jacot Tool or Pivot Polishing Tool (don't worry, we didn't understand what they were for when we made them either). They look like little fish with three holes in them and a slot cut from the tail through the center of all three holes. The are 6 millimeters wide and 12 millimeters long and each have different sized holes (for holding different sized work pieces). The distance between the holes is crucial and drilling them accurately is a real trick. Although I didn't fair too well in that category (I didn't take enough time plotting them out before punching and drilling), I came up with a novel way of getting the outlines all quite identical. After watching the other students struggle with these for days on end (I think a week on average), I figured that I could superglue all five pieces on top of each other with rods through the holes to align them properly. In that way I could file the outer shape of all of them simultaneously (from only a rough-cut pattern) and save loads of time. It worked well in that regard and the whole project took me only two days (and I even passed!).
 Having now caught up with the class for the most part, I got to join them in making screws. One in brass, then a smaller one in steel (not shown, still being graded), then a still smaller one in steel with a bevelled head (also not shown, like a wood screw sorta). The primary challenge of these pieces was the small size which dictated tighter tolerances. I went the extra mile on screw number two and anglaged the head and slot, we'll see how I get graded on it though (gulp). Screw number three was a real trick because the bevelled head had to be cut after the screw was hardened and tempered. It was only in this way that the threads could be held in the lathe without flattening them. Cutting threads is not terribly tricky as long as you go slow and make sure the piece and die are properly aligned throughout the process. It's very invigorating to put threads on something as the possibilities of things that can be manufactured multiply endlessly.
 The next project assigned was a barrel closing tool in plastic. I haven't taken a crack at this one yet because it must be manufactured on a slightly larger Levin lathe of which we only have one and so we have to take turns. Instead I skipped ahead to these brass carriers. They involve a little donut of brass with a matching screw to go in the side. We had to make three of them in different thicknesses and the holes will later be broached out to different sizes for different working sizes. Although this is only a pass/fail project (Does it work? Good. Check.) I took great pride in bevelling the donuts and the heads of the screws and putting three round grooves in each screw to make grasping adn turning them a little easier. (Do they work? Good. Check. Oh look, little grooves. Next.)
We are now working on filing squares. We have been assigned five different sized shafts to cut on the lathe and then must file the shafts into squares. This is tricky on the lathe with a file roller (how I did the square shaft on the balance tack and the hexagonal portion of the center punch) but infuriatingly difficult with just a pinvise and a file. After cutting the five sizes in the lathe and ruining all but one of them, I'm far from done with this little project. I think I need to sharpen my gravers.

_john davis11-29-2001
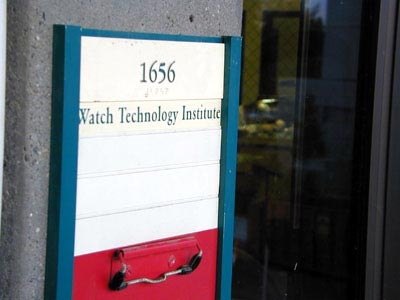
For more information about career opportunities in watchmaking, check out the Watch Technology Institute at North Seattle Community College.
Visit Now
Copyright November 2001 - Mr. John Davis and ThePuristS - all rights reserved


Next Article


The first WatchTech field trip - a visit to Générale Ressorts
© 2017 - WatchProZine