A David Walter Double Pendulum Clock – Part 11, Making a Cock
DonCorson

Every week we are seeing more of David's work on his new double pendulum clock.
- Installment 1 – Introduction and Cutting out the plates
- Installment 2 – Making the Barrel
- Installment 3 – The Suspension
- Installment 4 – Invar Pendulum Parts
- Installment 5 – Making the Wheels
- Installment 6 – Completing the Barrels, Cutting some Pinions
- Installment 7 – The Escape Wheels
- Installment 8 – The Mean/Solar Movement Main Train
- Installment 9 – The Equation Wheel
- Installment 10 - The Equation Movement is Finished
The part we will be making is a cock. Let's go!
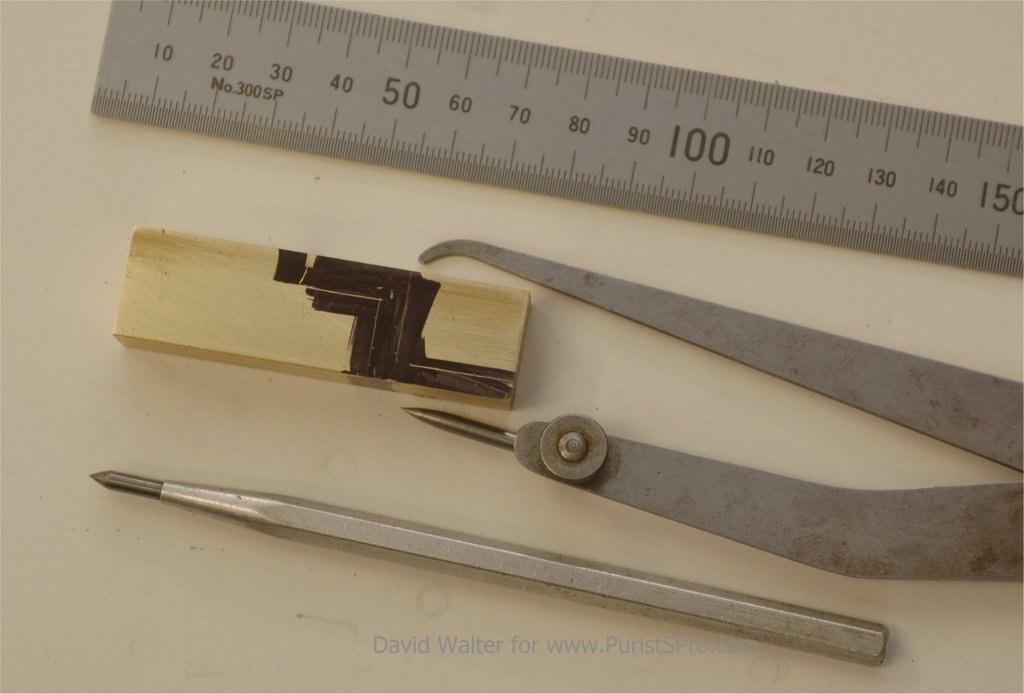
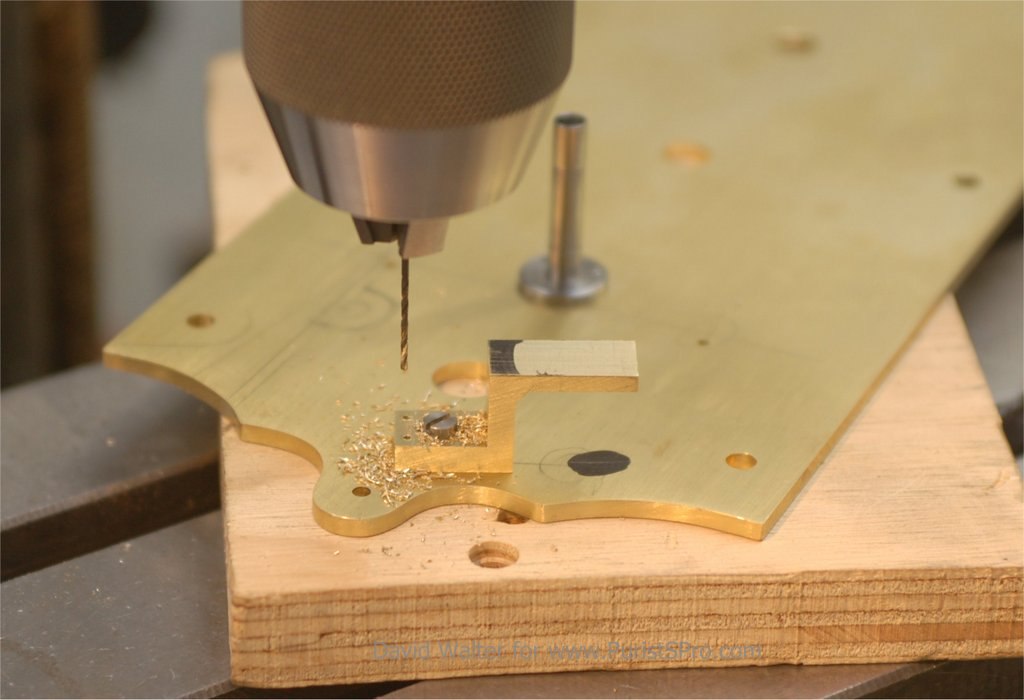
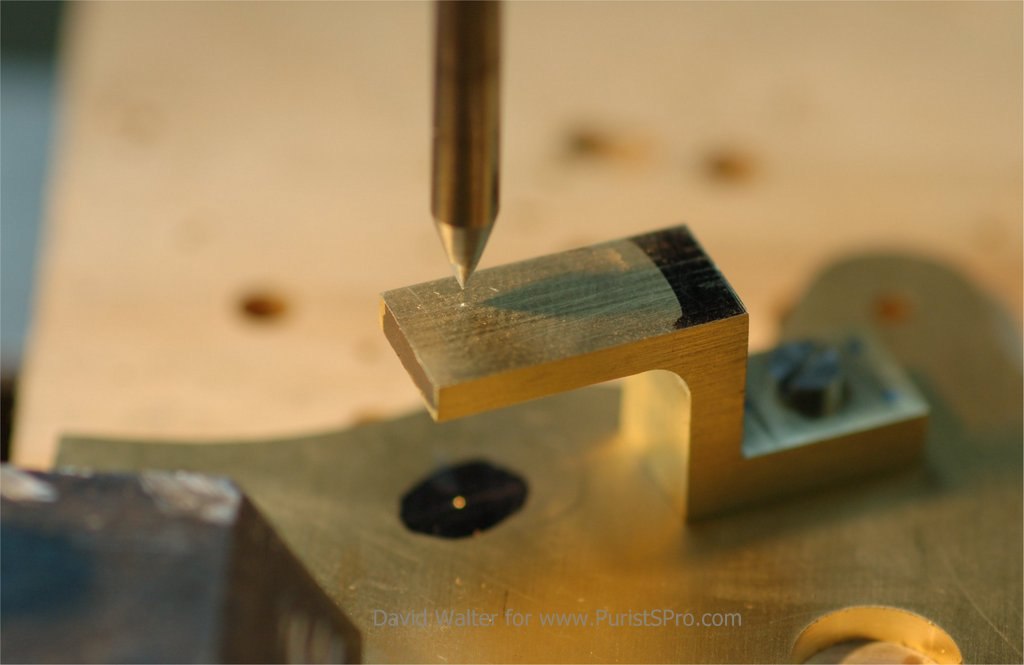
The form of the cock is marked on the brass bar.

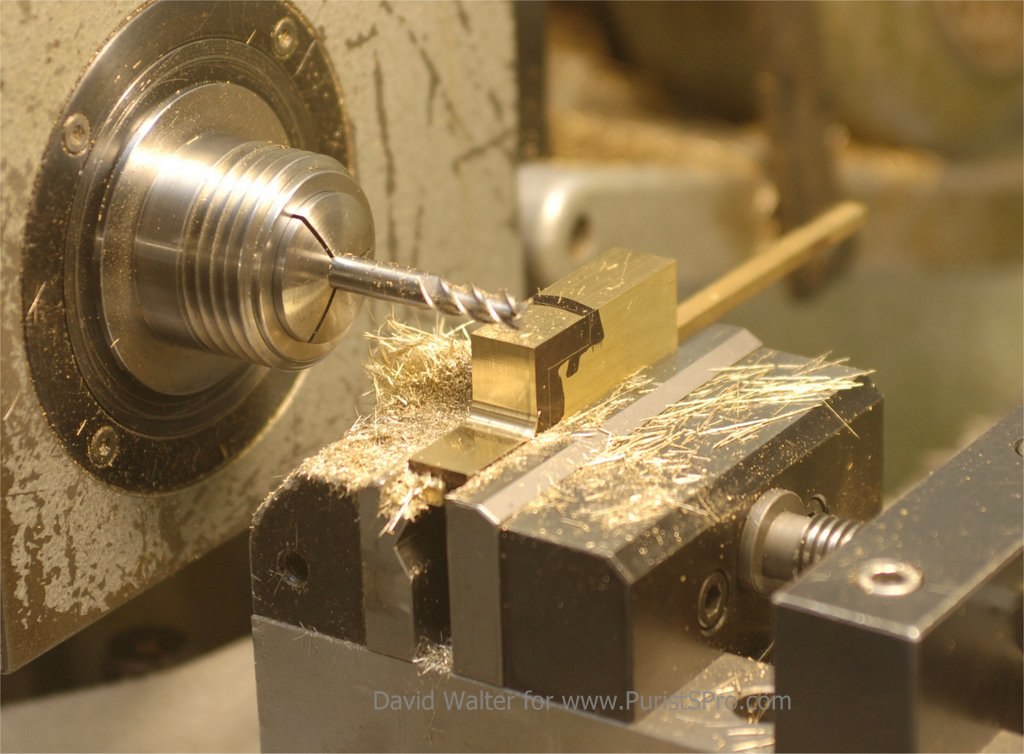
The top of the cock is milled to give it the correct height, This is done before cutting the rest of the cock to assure there is no flex while cutting.
Now the cock is cut out on the band saw...
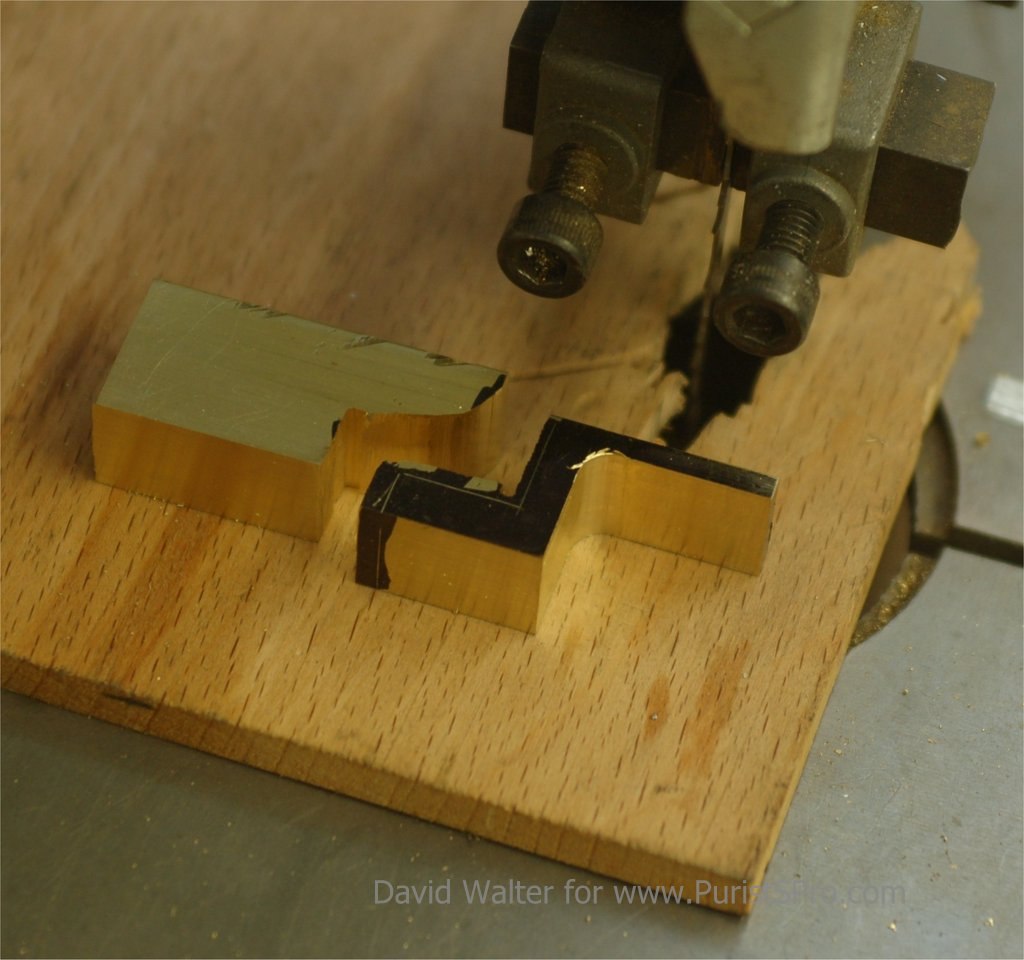
... the foot is milled ...
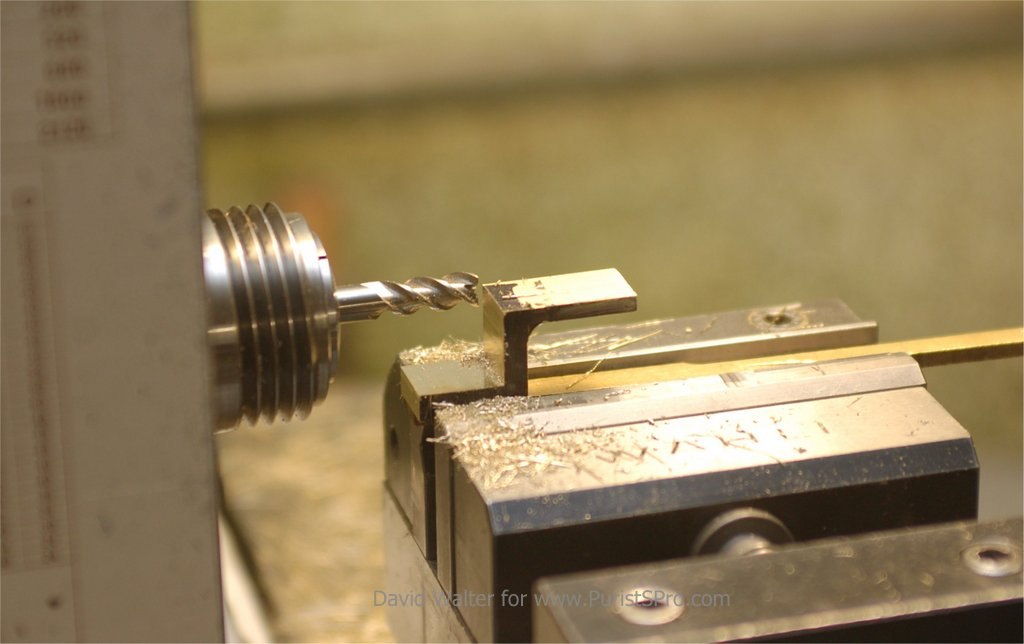
... and the underside recess in cut.

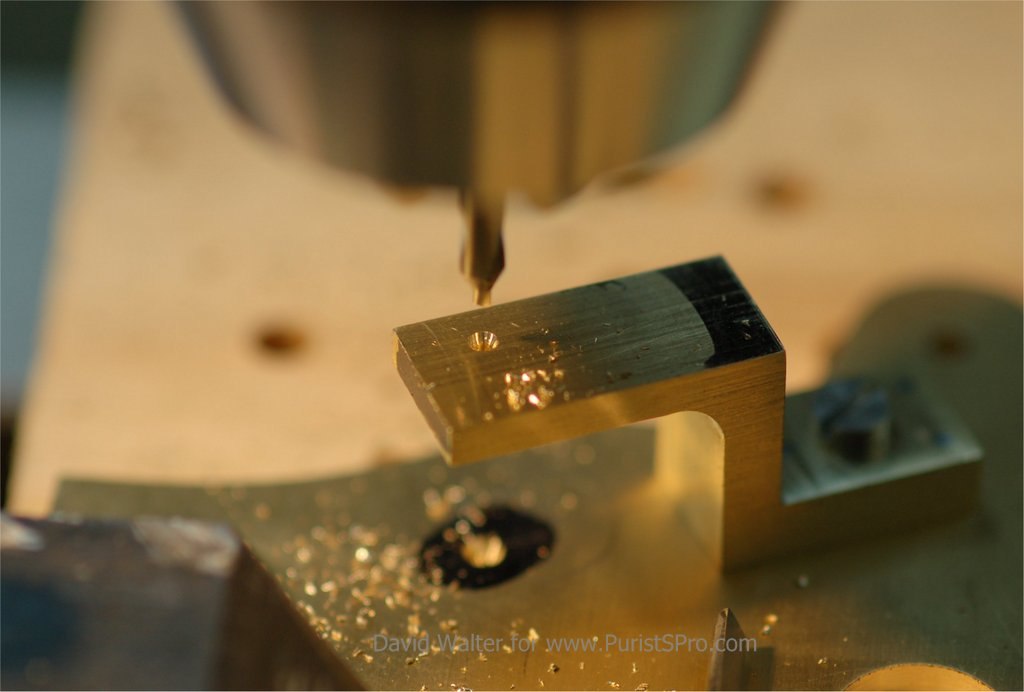
Now that the basic form is finished the cock is screwed in place and the holes for the guide pins drilled through the cock and into the plate. This will assure perfect positioning of the cock.
Now steel pins are firmly driven into the cock with a punch.
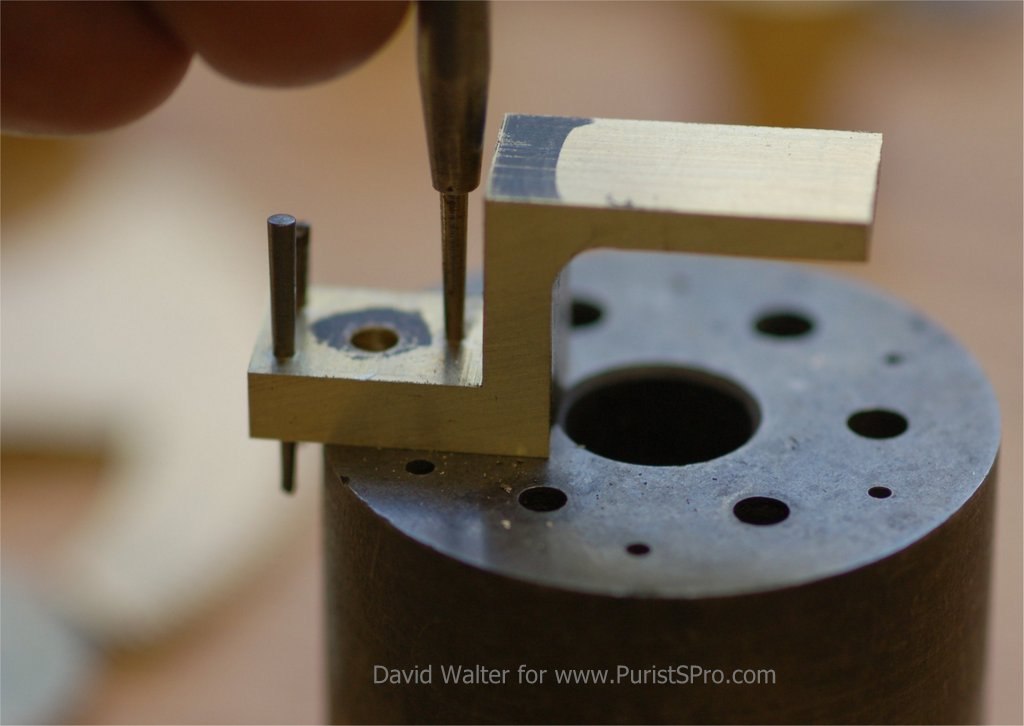
On the underside of the cock the pins are cut to length and rounded off.
On the top of the foot, the pins are filed off clean with the top surface of the cock foot.
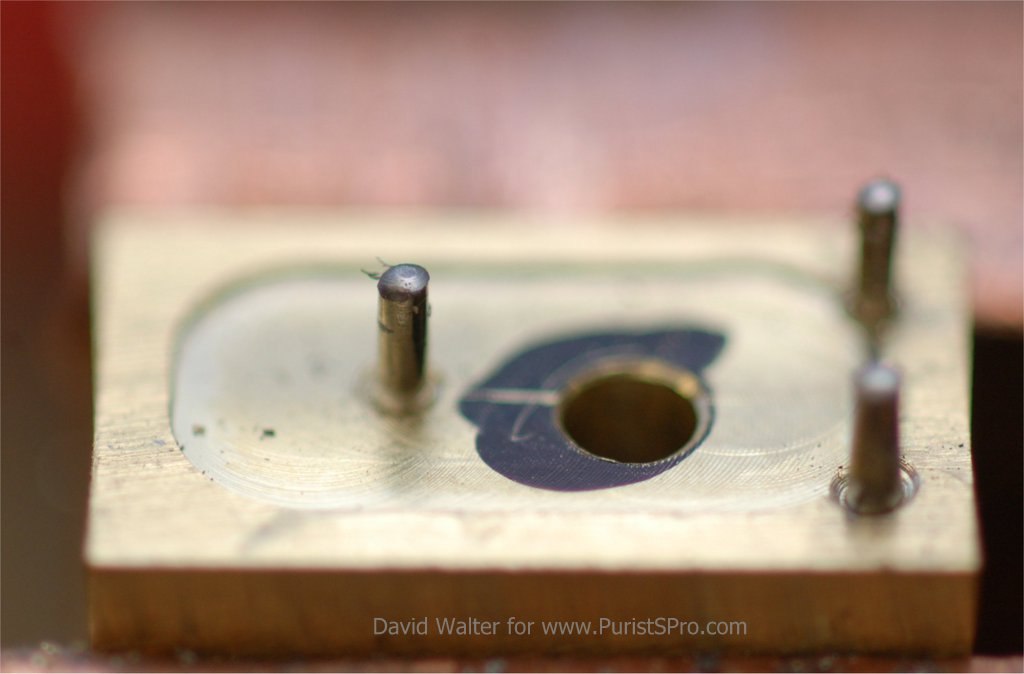
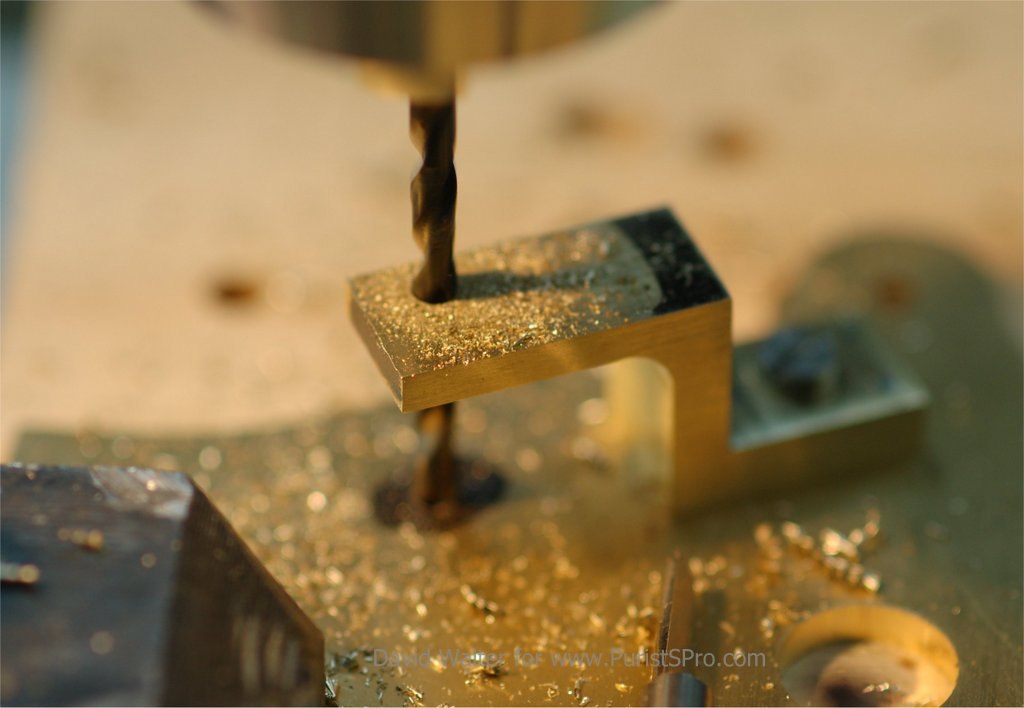
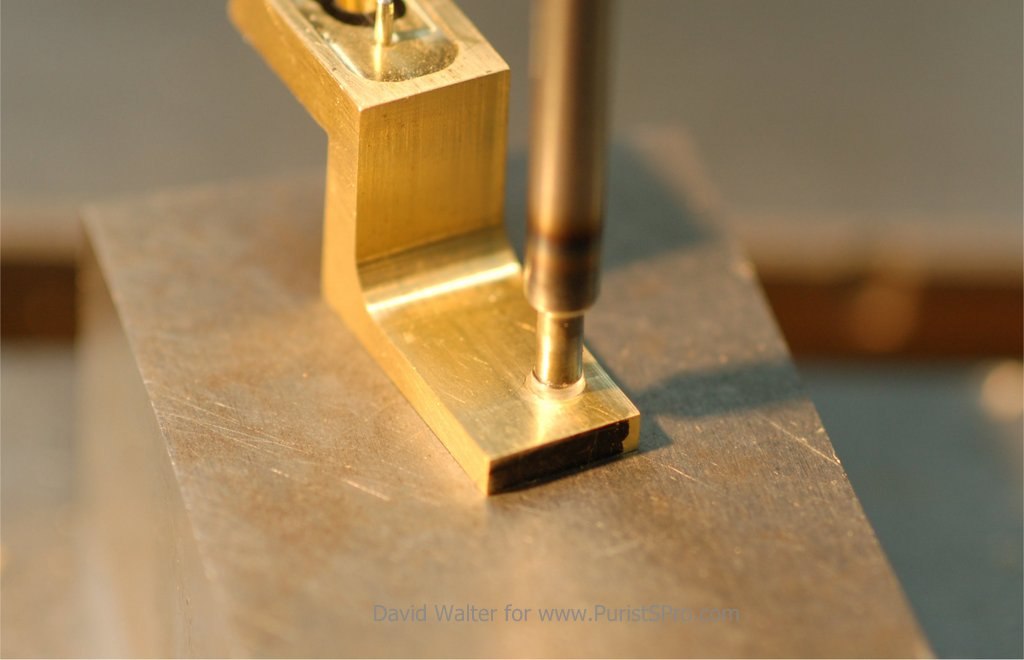
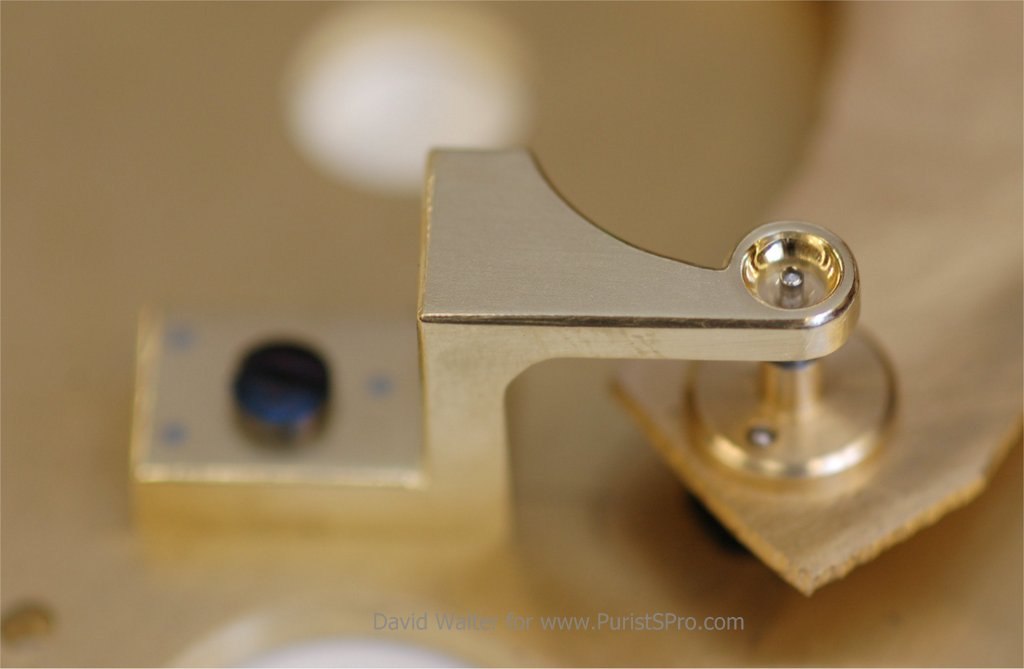
Now the cock positioning is defined and the center for the pivot and jewel is found. A centering hole is then drilled in the cock and the plate.
Then the clearance hole is drilled through both the cock and the plate.
After drilling the hole is reamed to size...
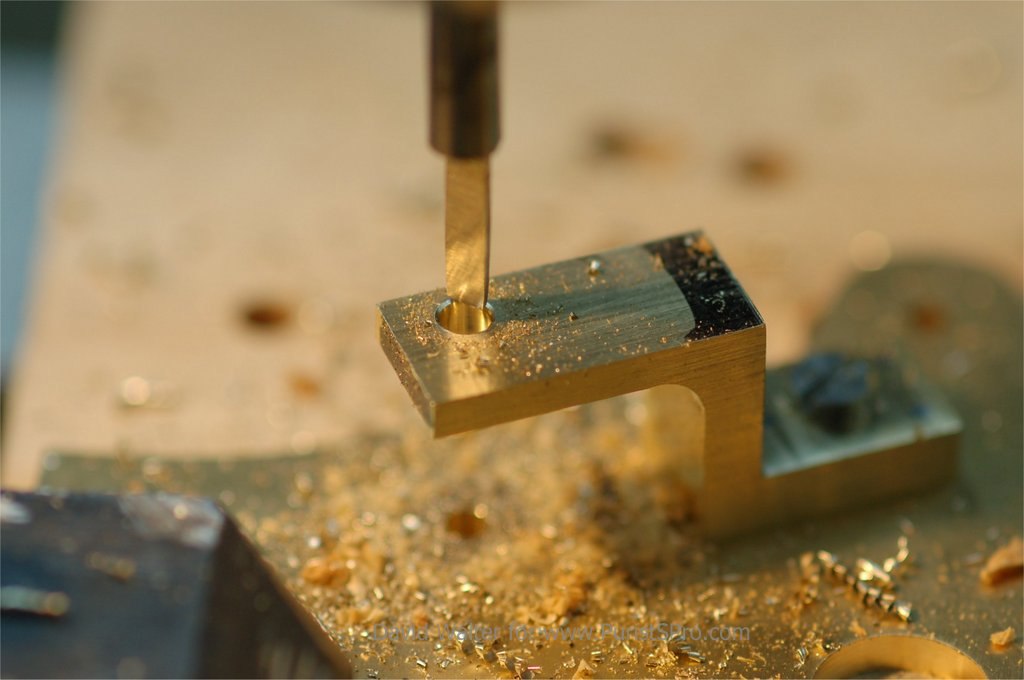
... and the jewel pressed into place.
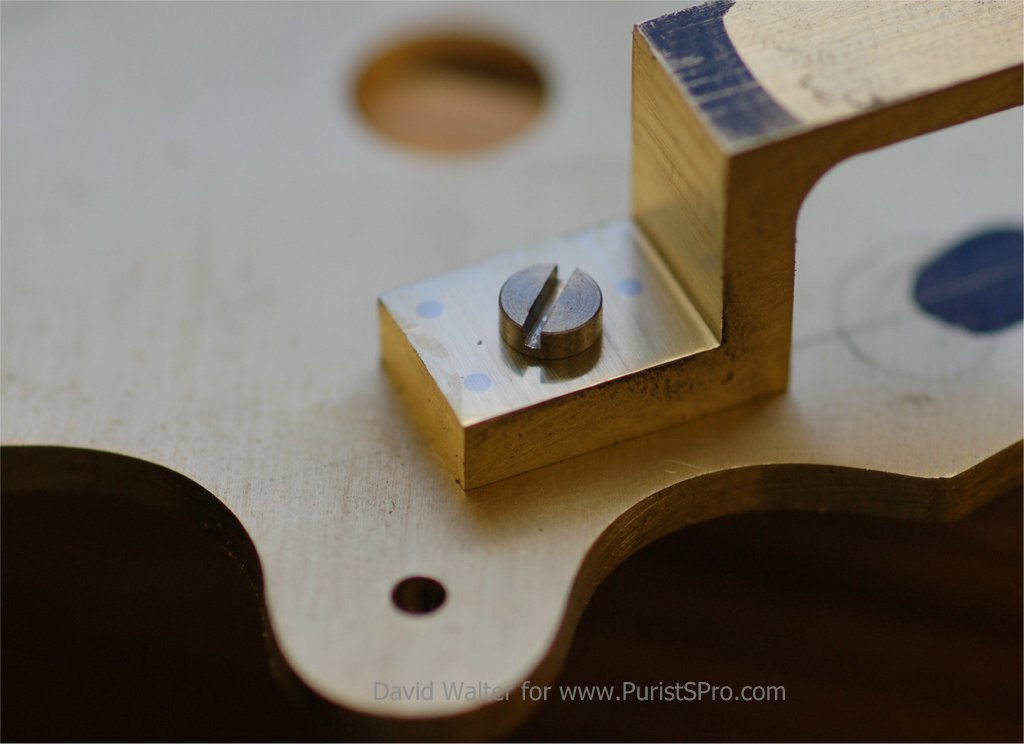
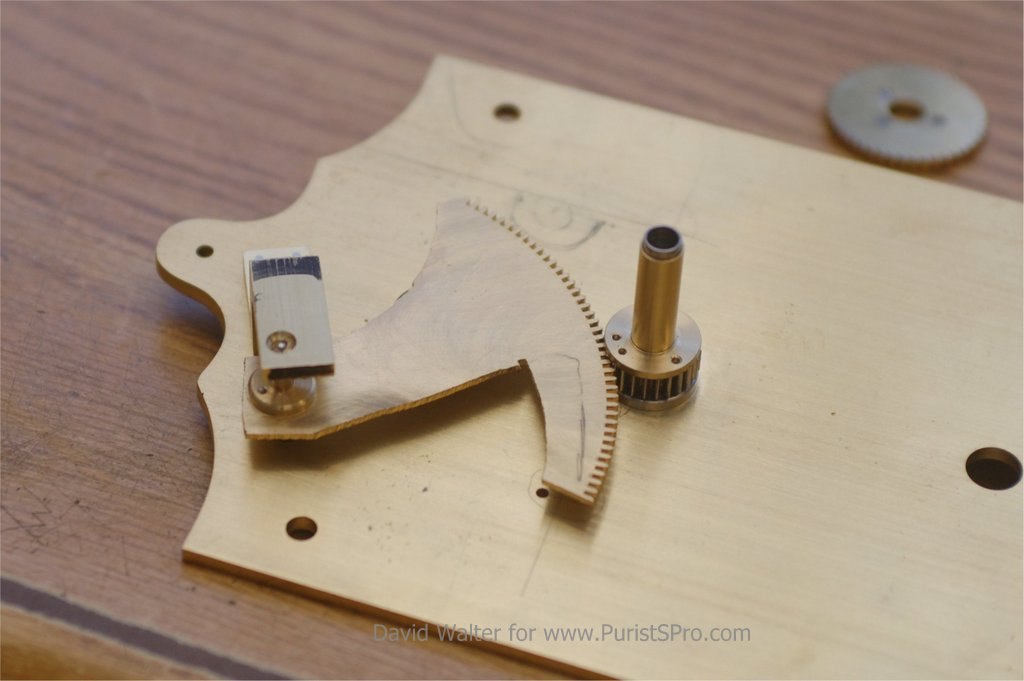
Now that the jewels are in place (in this case) the date rack and pinion can be installed and tested.
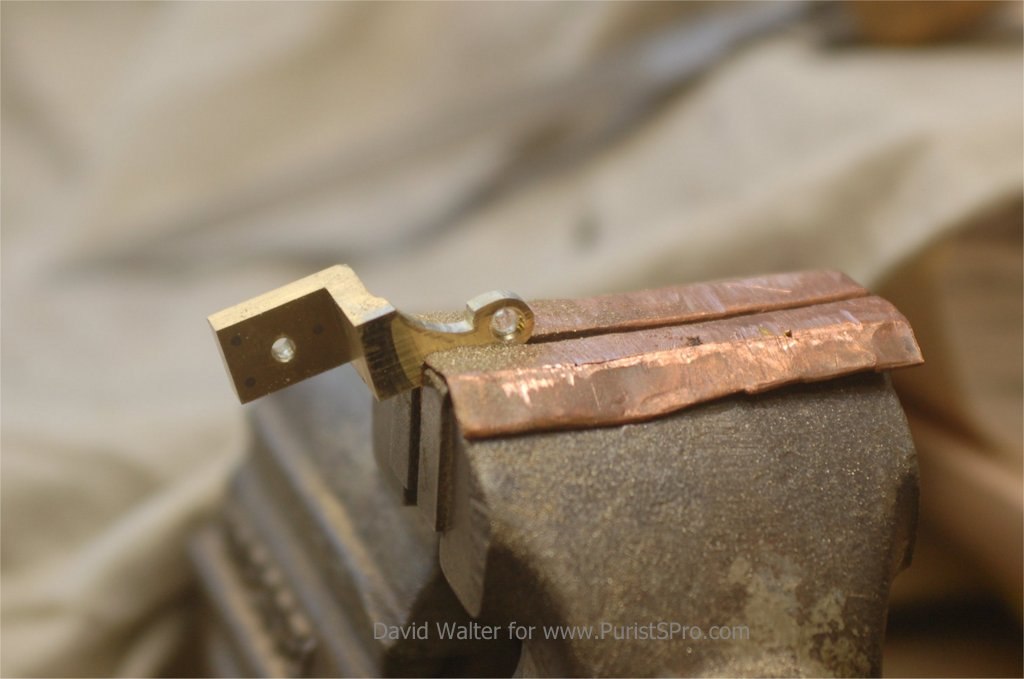
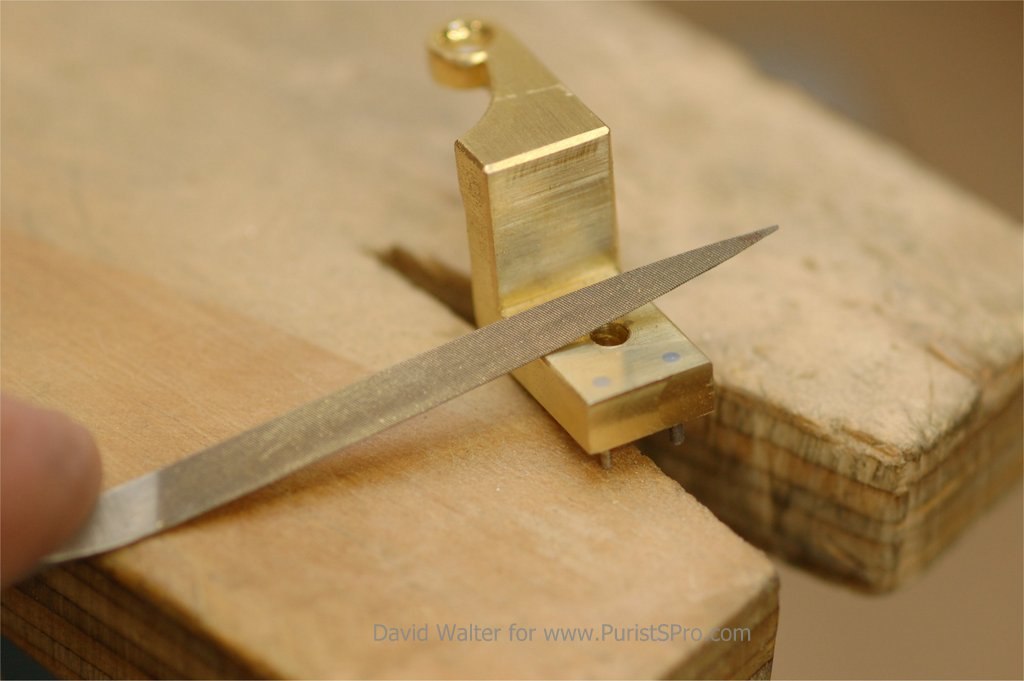
The functional side now completed, now it is time to make it pretty. The cock neck is filed by hand...
... the edges bevelled ...
... the oil sink cut and pre-polished.
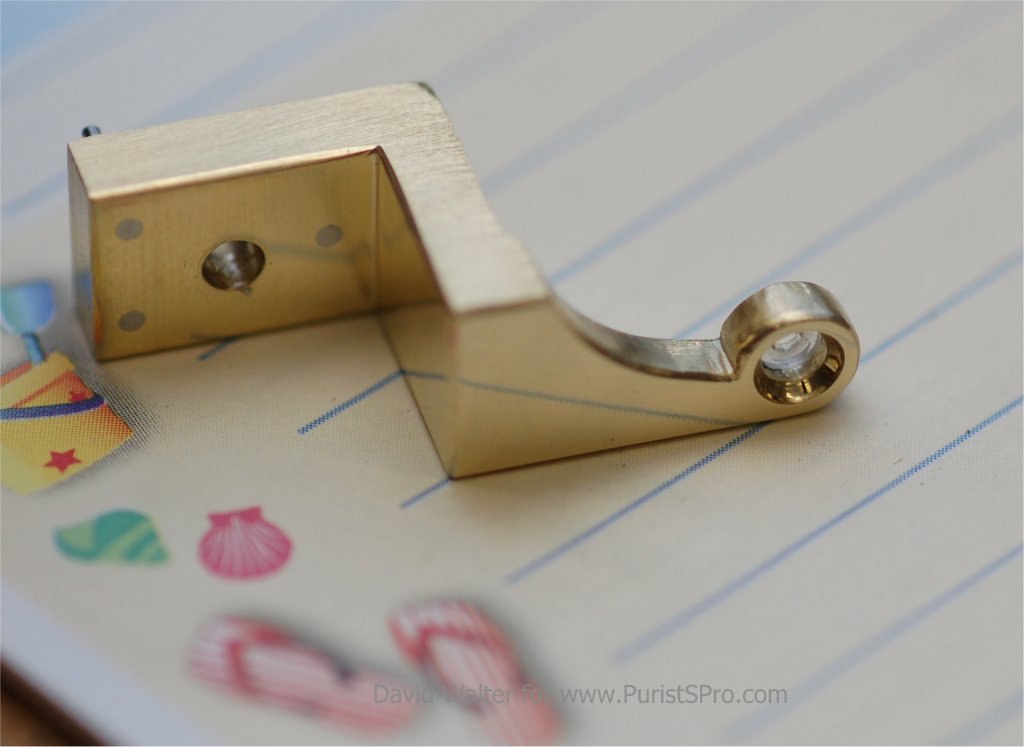
The cock is almost finished. The flat surfaces have been brushed and the oil sink polished. To be done remains only the final polishing of the bevels.
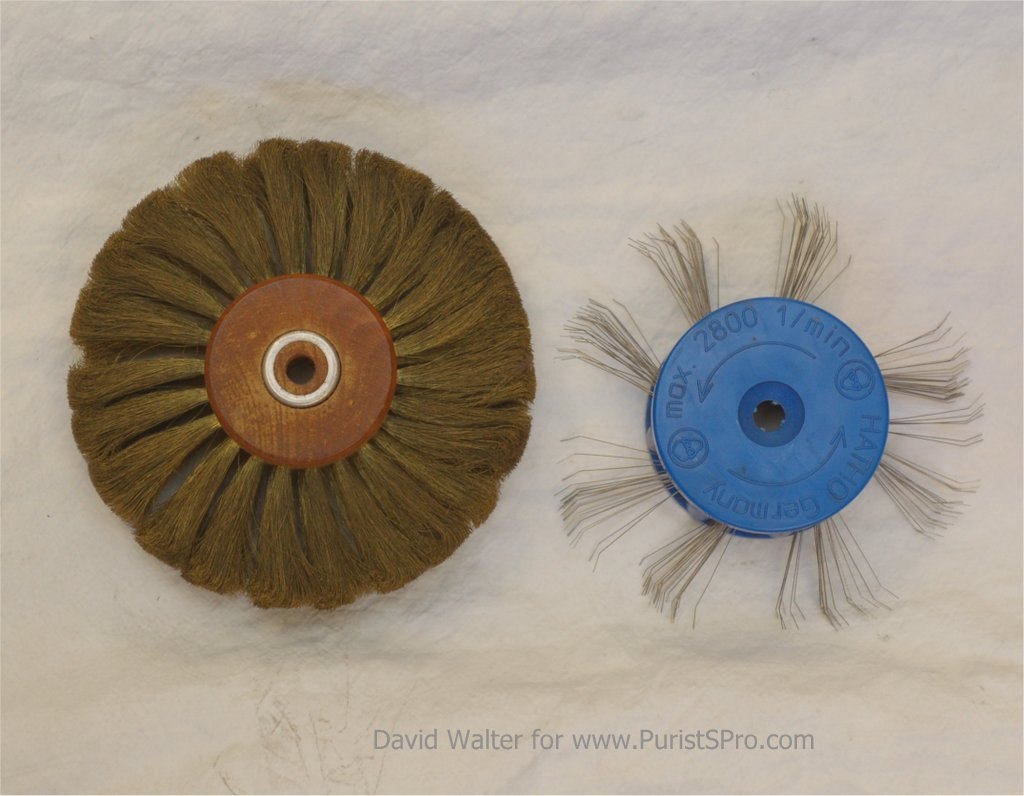
These are the brushes used for brushing the flat surfaces.
I hope that you have enjoyed this post and learned something about the work needed, and what is being done on each and every piece of this clock.
This message has been edited by cazalea on 2015-09-18 16:41:27 This message has been edited by MTF on 2015-09-19 17:46:12
This time we are
being treated to a documentation of the making of a single
part.
These things don't just drop finished on the table.
- Installment 1 – Introduction and Cutting out the plates
- Installment 2 – Making the Barrel
- Installment 3 – The Suspension
- Installment 4 – Invar Pendulum Parts
- Installment 5 – Making the Wheels
- Installment 6 – Completing the Barrels, Cutting some Pinions
- Installment 7 – The Escape Wheels
- Installment 8 – The Mean/Solar Movement Main Train
- Installment 9 – The Equation Wheel
- Installment 10 - The Equation Movement is Finished
The part we will be making is a cock. Let's go!
The form of the cock is marked on the brass bar.
The top of the cock is milled to give it the correct height, This is done before cutting the rest of the cock to assure there is no flex while cutting.
Now the cock is cut out on the band saw...
... the foot is milled ...
... and the underside recess in cut.
Now that the basic form is finished the cock is screwed in place and the holes for the guide pins drilled through the cock and into the plate. This will assure perfect positioning of the cock.
Now steel pins are firmly driven into the cock with a punch.
On the underside of the cock the pins are cut to length and rounded off.
On the top of the foot, the pins are filed off clean with the top surface of the cock foot.
Now the cock positioning is defined and the center for the pivot and jewel is found. A centering hole is then drilled in the cock and the plate.
Then the clearance hole is drilled through both the cock and the plate.
After drilling the hole is reamed to size...
... and the jewel pressed into place.
Such press-fit jewels require an excellent control of the hole diameter. The holes are reamed 2 hundredths of a mm smaller than the jewel. The jewel is then held in place by the elasticity of the brass.
Now that the jewels are in place (in this case) the date rack and pinion can be installed and tested.
The functional side now completed, now it is time to make it pretty. The cock neck is filed by hand...
... the edges bevelled ...
... the oil sink cut and pre-polished.
The cock is almost finished. The flat surfaces have been brushed and the oil sink polished. To be done remains only the final polishing of the bevels.
These are the brushes used for brushing the flat surfaces.
I hope that you have enjoyed this post and learned something about the work needed, and what is being done on each and every piece of this clock.
Comments:
aditya November 15th, 2015-18:38
I have not logged in for a few weeks and so much has happened! It really is a treat to see this clock being made. A question, are the brass parts eventually plated or left bare?

David Walter November 18th, 2015-08:17
To plate or not to plate ? The brass plates, cocks, bridges, pendulum bobs, pulleys & weight shells will be lacquered with a very hard lacquer to protect the surface from tarnishing. The wheels and any active components will not be lacquered. The lacquer I use was designed for hard...
aditya November 24th, 2015-10:09
Apologies if this comes across as argumentative .. But doesn't the lacquer add an unwanted layer in places?
David Walter November 24th, 2015-11:17
Lacquer yes it can which is why I dont lacquer the wheels, It is easier to deal with on the plates where cocks and pillars fit by adjusting the endshakes David
0-10-5
Load More Comments
Next Article
DonCorson
A David Walter Double Pendulum Clock – Part 8, The Mean/Solar Main Train
DonCorson
A David Walter Double Pendulum Clock – Part 8, The Mean/Solar Main Train Every week we are seeing more of David's work on his new double pendulum clock. This week we have lots to see. The Mean/Solar movement main train and motion work are depthed in, the wheels all crossed out, the pivots finished to size, the jewels fitted to the plates and jeweled endpieces made and fitted. Let's take a look over Davids shoulder by his work.
© 2017 - WatchProZine